


Physical Camera (from Max 2016 on)
LESSON#3-B – Physical Camera
- HD VIDEO
- How to see a Dof preview
- Hw to correct the vertical lines
- Use EV to lock your exposure
- Speed up the Dof setting
Starting from 3ds Max 2016, Autodesk and Chaos Group cooperated to create together the new ‘Physical Camera’. Basically it’s the same script, with some additional tool.
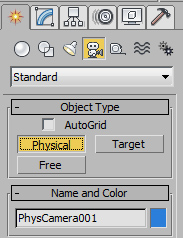
If you have 3ds Max 2016 or superior, you can use the new Physical Camera, but you can also can keep working with the ‘old’ V-Ray Physical Camera (just use a simple below).
Both cameras produce the me result, anyway Physical Camera has some interesting features
that I’m going to explain in this lesson:
 CONCEPTS:
- Set Realistic as visualization mode, to see a Dof previen in your viewport
- Enable Perspective Control > ‘Auto Vertical Tilt Correction’ to have lines always vertically corrected
- Every combination of f/shutterS/ISO correspond to a specific EV
- You can lock the EV (Target) to keep constant the exposure
- With EV locked you can change f (focesd area) without altering the exposure
- With EV locked you don’t need to compensate with Shutter Speed
SUGGESTION
If you are wokring with 3ds Max 2015 or some previous version and you’re fine with it, I suggest you to not install a more recent 3ds Max version only for Physical! It’s just a tool, you can work anyway with your V-Ray Physical Camera
HOW TO GET THE ‘Old’ V-RAY PHYSICAL CAMERA
Are you missing it? Type this simple script in the pink field (bottom-left), then press enter
This script creates a ‘classical’ V-Ray Physical Camera in the [ 0,0,0 ] coordinates:
vrayCreateVrayPhysicalCamera()

 EXERCISE
There are no files to download for now, all you learn in this lesson is applicable to any file